검색결과 리스트
IT(Old)/Android에 해당되는 글 10건
- 2007.12.10 activity life cycle 시작과 끝
- 2007.12.04 android GUI vs XML (android/samples/app)
- 2007.12.03 android adb shell 및 sd card setting 법
- 2007.11.30 android emulator limitations(안드로이드 에뮬레이터 제한사항) 삽질금지
- 2007.11.28 Designing Your Screen in XML(andorid XML디자인)
- 2007.11.27 android 계산기 한번 만들어 보자꾸나 5
- 2007.11.22 Android 몇가지 데모 실행 성공 -__-
- 2007.11.21 Android Architecture(안드로이드 아키텍쳐)
- 2007.11.21 Activity란 무엇인가?
- 2007.11.14 Android Release 1
글
activity life cycle 시작과 끝
| Method | Description | Killable? | Next | ||
|---|---|---|---|---|---|
| onCreate() | Called when the activity is first created. This is where you should do all of your normal static set up: create views, bind data to lists, etc. This method also provides you with a Bundle containing the activity's previously frozen state, if there was one.
Always followed by |
No | onResume() | ||
| onStart() | Called when the activity is becoming visible to the user.
Followed by |
No | onRestart() or onResume() | ||
| onRestart() | Called after your activity has been stopped, prior to it being resumed again.
Always followed by |
No | onResume() | ||
| onResume() | Called when the activity will start interacting with the user. At this point your activity is at the top of the activity stack, with user input going to it.
Followed by either |
No | onFreeze() oronPause() | ||
| onFreeze() | Allows you to save away your current state, when your activity is being paused and another one resuming to interact with the user. After being paused, the system may at any time need to stop (or even outright kill) your application in order to claim resources for the current foreground activity. If this should happen, the state you supply here will later be given back to you onCreate() when a new instance of your activity is started to interact with the user.
Always followed by |
No | onPause() | ||
| onPause() | Called when the system is about to start resuming a previous activity. This is typically used to commit unsaved changes to persistent data, stop animations and other things that may be consuming CPU, etc. Implementations of this method must be very quick because the next activity will not be resumed until this method returns.
Followed by either |
Yes | onResume() oronStop() | ||
| onStop() | Called when the activity is no longer visible to the user, because another activity has been resumed and is covering this one. This may happen either because a new activity is being started, an existing one is being brought in front of this one, or this one is being destroyed.
Followed by either |
Yes | onStart() oronDestroy() | ||
| onDestroy() | The final call you receive before your activity is destroyed. This can happen either because the activity is finishing (someone called finish() on it, or because the system is temporarily destroying this instance of the activity to save space. You can distinguish between these two scenarios with the isFinishing() method. | Yes | nothing | ||
Note the "Killable" column in the above table -- for those methods that are marked as being killable, after that method returns the process hosting the activity may killed by the system at any time without another line of its code being executed. Thus you should take advantage of onFreeze() (for saving your current UI state) and onPause() (for writing any edits to persistent storage) so that the activity will be correctly restored to its current state in the event that it is killed. See the Process Lifecycle section for more information on how the lifecycle of a process is tied to the activities it is hosting.
For those methods that are not marked as being killable, the activity's process will not be killed by the system starting from the time the method is called and continuing after it returns. Thus an activity is in the killable state, for example, between after onPause() to the start of onResume().
설정
트랙백
댓글
글
android GUI vs XML (android/samples/app)
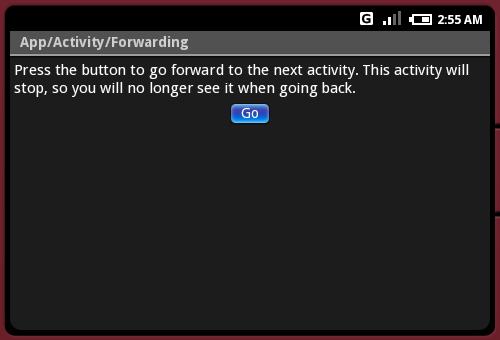
forwarding.xml
android:gravity="center_horizontal"
android:layout_width="fill_parent" android:layout_height="fill_parent">
<TextView
android:layout_width="fill_parent" android:layout_height="wrap_content"
android:layout_weight="0"
android:paddingBottom="4dip"
android:text="@string/forwarding"/>
<Button id="@+id/go"
android:layout_width="wrap_content" android:layout_height="wrap_content"
android:text="@string/go">
<requestFocus />
</Button>
</LinearLayout>
-----------------------------------------------------------------------------------------------------
2. hello_world.xml
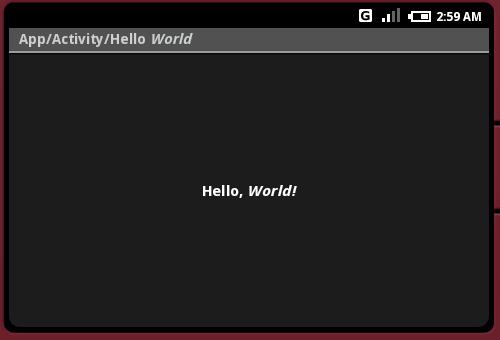
<TextView xmlns:android="http://schemas.android.com/apk/res/android" id="@+id/text"
android:layout_width="fill_parent" android:layout_height="fill_parent"
android:gravity="center_vertical" android:textAlign="center"
android:text="@string/hello_world"/>
-----------------------------------------------------------------------------------------------------
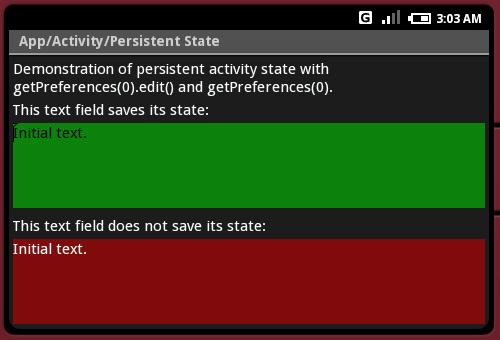
3. save_restore_state.xml
android:layout_width="fill_parent" android:layout_height="fill_parent">
<TextView id="@+id/msg"
android:layout_width="fill_parent" android:layout_height="wrap_content"
android:layout_weight="0"
android:paddingBottom="4dip" />
<TextView
android:layout_width="fill_parent" android:layout_height="wrap_content"
android:layout_weight="0"
android:paddingBottom="4dip"
android:text="@string/saves_state"/>
<EditText id="@+id/saved"
android:layout_width="fill_parent" android:layout_height="wrap_content"
android:layout_weight="1"
android:background="@drawable/green"
android:text="@string/initial_text">
<requestFocus />
</EditText>
<TextView
android:layout_width="fill_parent" android:layout_height="wrap_content"
android:layout_weight="0"
android:paddingTop="8dip"
android:paddingBottom="4dip"
android:text="@string/no_saves_state"/>
<EditText
android:layout_width="fill_parent" android:layout_height="wrap_content"
android:layout_weight="1"
android:background="@drawable/red"
android:text="@string/initial_text">
</EditText>
</LinearLayout>
-----------------------------------------------------------------------------------------------------
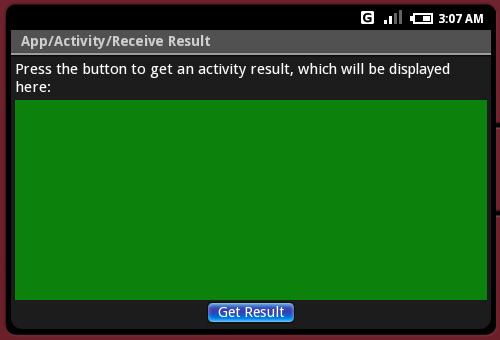
4. receive_result.xml
<LinearLayout xmlns:android="http://schemas.android.com/apk/res/android" android:orientation="vertical" android:padding="4dip"
android:gravity="center_horizontal"
android:layout_width="fill_parent" android:layout_height="fill_parent">
<TextView
android:layout_width="fill_parent" android:layout_height="wrap_content"
android:layout_weight="0"
android:paddingBottom="4dip"
android:text="@string/receive_result_instructions"/>
<TextView id="@+id/results"
android:layout_width="fill_parent" android:layout_height="10dip"
android:layout_weight="1"
android:paddingBottom="4dip"
android:background="@drawable/green">
</TextView>
<Button id="@+id/get"
android:layout_width="wrap_content" android:layout_height="wrap_content"
android:layout_weight="0"
android:text="@string/receive_result_result">
<requestFocus />
</Button>
</LinearLayout>
-----------------------------------------------------------------------------------------------------
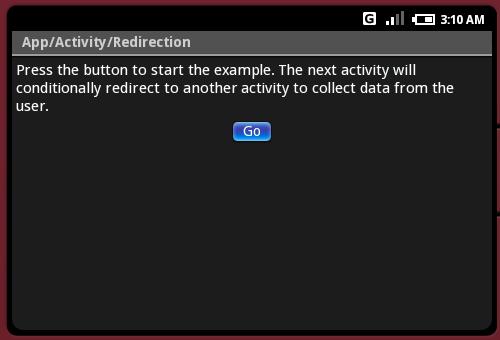
5. redirect_enter.xml
<LinearLayout xmlns:android="http://schemas.android.com/apk/res/android" android:orientation="vertical" android:padding="4dip"
android:gravity="center_horizontal"
android:layout_width="fill_parent" android:layout_height="fill_parent">
<TextView
android:layout_width="fill_parent" android:layout_height="wrap_content"
android:layout_weight="0"
android:paddingBottom="4dip"
android:text="@string/redirect_enter"/>
<Button id="@+id/go"
android:layout_width="wrap_content" android:layout_height="wrap_content"
android:text="@string/go">
<requestFocus />
</Button>
</LinearLayout>
-----------------------------------------------------------------------------------------------------
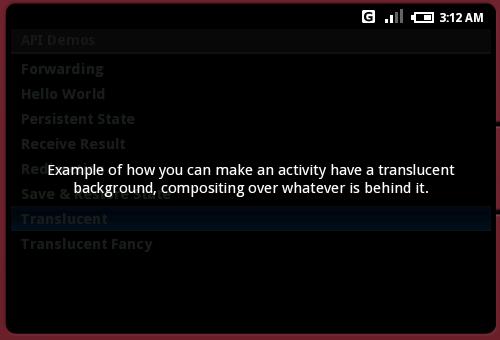
6. translucent_background.xml
android:layout_width="fill_parent" android:layout_height="fill_parent"
android:gravity="center_vertical" android:textAlign="center"
android:text="@string/translucent_background"/>
-----------------------------------------------------------------------------------------------------
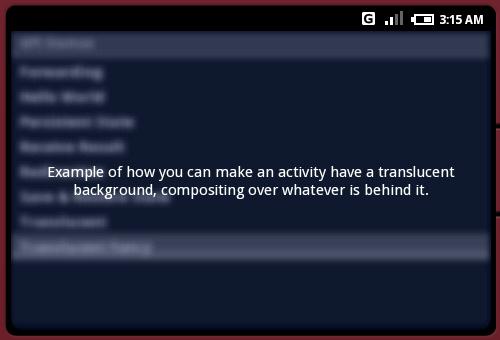
7. TranslucentFancyActivity.java
protected void onCreate(Bundle icicle)
{
// Be sure to call the super class.
super.onCreate(icicle);
// Have the system blur any windows behind this one.
getWindow().setFlags(WindowManager.LayoutParams.BLUR_BEHIND_FLAG,
WindowManager.LayoutParams.BLUR_BEHIND_FLAG);
// Apply a tint to any windows behind this one. Doing a tint this
// way is more efficient than using a translucent background. Note
// that the tint color really should come from a resource.
WindowManager.LayoutParams lp = getWindow().getAttributes();
lp.tintBehind = 0x60000820;
getWindow().setAttributes(lp);
// See assets/res/any/layout/translucent_background.xml for this
// view layout definition, which is being set here as
// the content of our screen.
setContentView(R.layout.translucent_background);
}
설정
트랙백
댓글
글
android adb shell 및 sd card setting 법
* sd카드 잡는법 1
1) mksdcard 2048M mysdcard (일단 만들고)
2) emulator -sdcard mysdcard (에뮬레이터 옵션에 -sdcard mysdcard 를 넣고)
3) adb push local_file sdcard/remote_file(컴퓨터에 있는 파일을 가상의 sdcard로 넣는다)
넘 간단한가...
나같은 경우는 다른 방법으로 잡았다.
* SD카드 잡는법 2
1) mksdcard.exe 256M c:\android_music (위치를 만든다)
2) 아래와 같이 이클립스 실행 옵션에 -sdcard C:\android_music 를 넣었다.
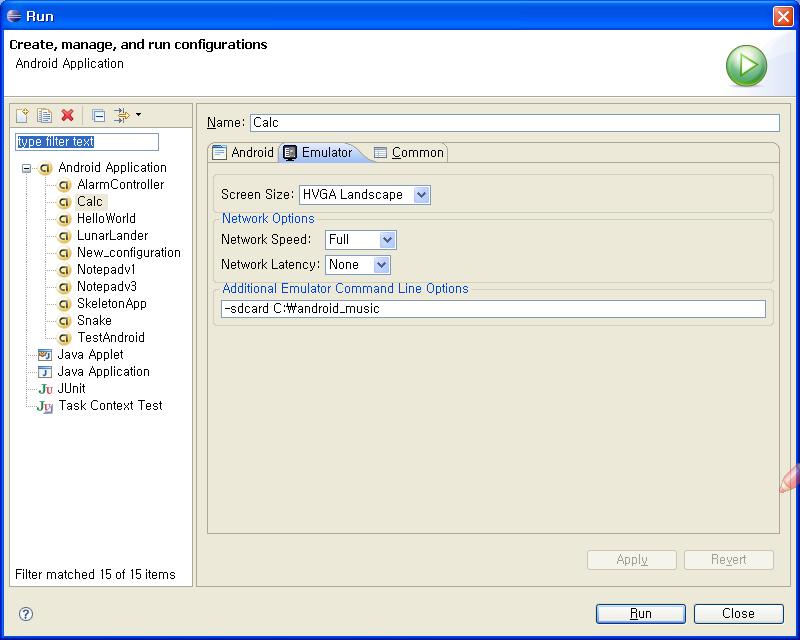
android emulator 실행후
3) adb push c:\a.mp3 c:\android_music\a.mp3
로 실행하니.... SDcard 위치에 새로운 mp3가 생겼겟찌?
퀴즈.
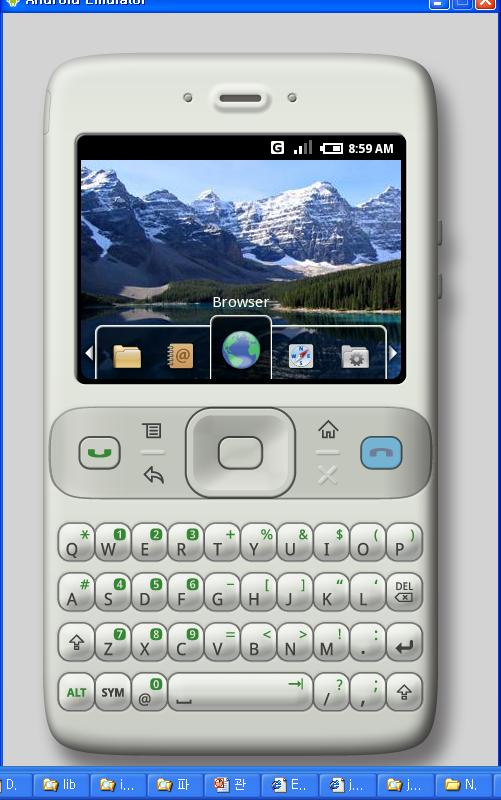
다음 이미지의 출처는 어디일까요?
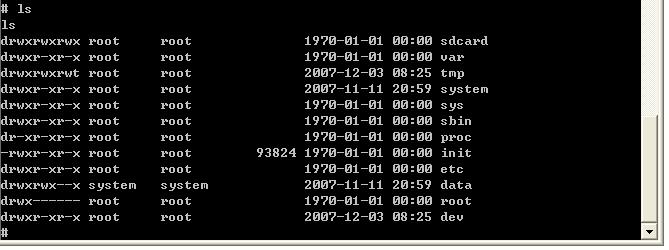
좀더 자세히 보여드릴까요?
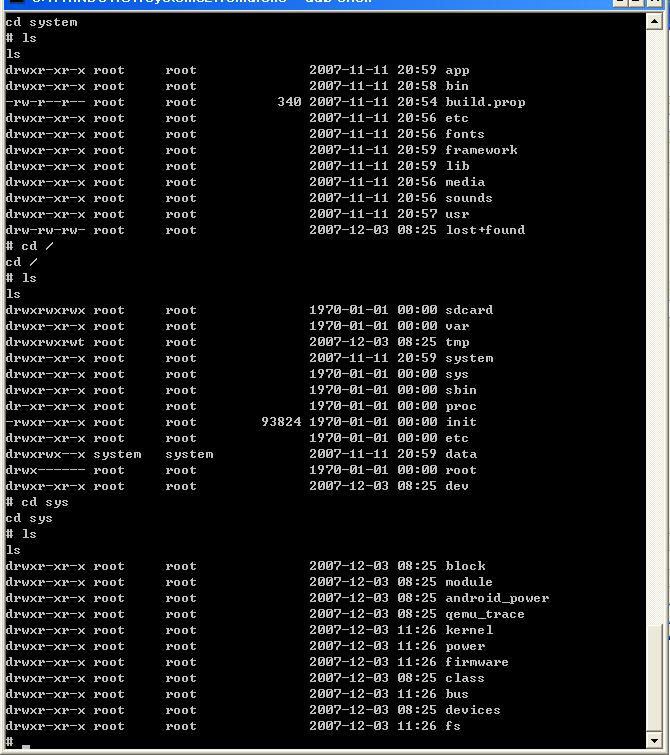
눈치 빠르신분은 알겠지만.. android emulator 내부 모습입니다.
도스창에서 간단한 명령어
adb shell 을 치면 바로 android로 들어갈 수 있네요
마치 핸드폰을 해킹 했다는 그런 기분...이 드는거 나만 그런가? -_-
일단 팁이었습니다.
그럼 이만.
설정
트랙백
댓글
글
android emulator limitations(안드로이드 에뮬레이터 제한사항) 삽질금지
무턱대고 android에 덤벼들지 말자
아래와 같은 하드웨어적인 지원이 아주 약하다.
Emulator Limitations
이번 릴리즈에는. 에뮬레이터의 제약조건은 다음을 포함함다.
- 실제 전화통화를 주고 받을 수 없다. 그러나 에뮬레이터 콘솔 화면을 통해서 전화통화(보내고 받는것)을 시뮬레이션 할수 있다.
- USB연결에 대한 지원이 안된다.
- 카메라나 비디오 캡쳐 지원이 안된다.(입력)
- 음성 입력에 대한 지원이 안된다. 하지만 음성출력은 지원된다.
- 장치에 부착된 헤드폰을 지원 안한다.
- 연결된 상태를 알수 없다.
- 배터리 충전 level과 AC 충전중인 상태를 알 수 없다.
- SD카드를 끼웠는지 뺐는지를 알수 없다.
- 블루투스를 지원하지 않는다.
출처 : http://code.google.com/android/reference/emulator.html#limitations
설정
트랙백
댓글
글
Designing Your Screen in XML(andorid XML디자인)
Designing Your Screen in XML
소스코드 안에다 화면 디자인하는것이 성가신 작업이 될 수 있기에, Android는 XML문법으로 화면 디자인하는 것을 지원한다. Android는 아주 많은수의 custom elements를 정의하고 있고, 그것들은 독특한 Android View subclass를 대표한다. 당신은 일련의 태그기반의 HTML파일을 생성한것과 같은 방법으로 화면을
디자인할수 있고, 그 파일은 application의 res/layout 디렉토리 안에 XML 파일로 저장된다. 어떤 elements가 표현되는지 그리고 XML파일 포맷을 배우기 위해서 Layout Resources를 보아라. 각 파일은 single android.view.View를 설명하고 있다. 하지만 이 element는 단순한 visual element 또는 자식 객체들의 collection을 포함하는 layout element가 될수도 있다(screen 또는 screen의 일부). Android가 당신의 application을 compiles 할때, 그것은 android.view.View 리소스로 complie하고, 당신의 Activity.onCreate() 안에 구현된 setContentView(R.layout.layout_file_name)을 호출하는 것으로 당신의 코드안에서 그것을 load할 수 있다.
각 XML파일은 android GUI classes에 상응하는 태그들로 구성된다. 이 태그들은 class안에 있는 methods에 상응하는 attributes를 가지고 있다.(예를 들면, EditText는 text attibute를 가지고 그것은 EditText.setText와 같다.)
class와 method 이름들 그리고 element와 attribute 이름들이 정확하게 일치하는 것은 아니라는걸 명심해라. - 거의 비슷하다, 하지만 항상 1대1 관계는 아니다.
또한 Android는 XML안에 그들이 나타나는 순서대로 elements를 그리는 경향이 있다. 그래서 elements가 겹치게 되면, XML파일안에 마지막놈이 같은 공간에 있는 이전에 listing된 elements들중 1순위로 그려지게 될 것이다.
각 XML파일은 single View 또는 ViewGroup 객체에 기반을 둔 tree로 컴파일된다. 그래서 single root 태그를 포함해야 한다. 다음 예제에서, 그것은 가장 바깥에 있는 LinearLayout 객체를 evaluate한다.
layout_somthing이라 이름 붙여진 Attriutes는 객체의 LayoutParams멤버로 적용된다. Layout Resources는 또한 LayoutParams의 peroperties를 상세하기 위한 문법을 어떻게 배우는지 설명한다.
다음 값들은 치수를 지원한다.(TypedValue에 설명되어 있음)
- px (pixels)
- dip (device independent pixels)
- sp (scaled pixels — best for text size)
- pt (points)
- in (inches)
- mm (millimeters)
Example: android:layout_width="25px"
이 dimensions에 대한 더많은 정보를 원한다면, Dimension Values를 보아라.
다음 XML파일은 (오른쪽과같이)보여지는 screen을 생성한다. screen의 상단에 위치한 text는 Activity.setTitle라 불리는 것에 의해 set되는 것을 기억해라. 관련된 elements(layout_toLeft)를 가리키는 attributes는 연관된 resource의 문법을 사용하는 ID를 참조한다.(@id/id_number)
The following XML file creates the screen shown. Note that the text on the top of the screen was set by calling Activity.setTitle. Note that the attributes that refer to relative elements (i.e., layout_toLeft) refer to the ID using the syntax of a relative resource (@id/id_number).
<?xml version="1.0" encoding="utf-8"?>
<!-- Demonstrates using a relative layout to create a form -->
<RelativeLayout xmlns:android="http://schemas.android.com/apk/res/android
                android:layout_width="fill_parent"
                android:layout_height="wrap_content"
                android:background="@drawable/blue"
                android:padding="10px">

    <TextView id="@+id/label"
              android:layout_width="fill_parent"
              android:layout_height="wrap_content"
              android:text="Type here:"/>

    <EditText id="@+id/entry"
              android:layout_width="fill_parent"
              android:layout_height="wrap_content"
              android:background="@android:drawable/editbox_background"
              android:layout_below="@id/label"/>

    <Button id="@+id/ok"
            android:layout_width="wrap_content"
            android:layout_height="wrap_content"
            android:layout_below="@id/entry"
            android:layout_alignParentRight="true"
            android:layout_marginLeft="10px"
            android:text="OK" />

    <Button android:layout_width="wrap_content"
            android:layout_height="wrap_content"
            android:layout_toLeft="@id/ok"
            android:layout_alignTop="@id/ok"
            android:text="Cancel" />
</RelativeLayout> |
 |
Loading the XML Resource
컴파일된 layout resource를 loading하는 것은 매우 쉽고 application의 onCreate()를 호출하는것에 의해 실행된다. 아래와같다
protected void onCreate(Bundle savedValues)
{
   // Be sure to call the super class.
   super.onCreate(savedValues);

   // Load the compiled layout resource into the window's
   // default ViewGroup.
   // The source file is res/layout/hello_activity.xml
    setContentView(R.layout.hello_activity);

   // Retrieve any important stored values.
   restoreValues(savedValues);
} 설정
트랙백
댓글
글
android 계산기 한번 만들어 보자꾸나
난 개발자다.
근데.,,월요일 화요일 회사 세바뀌를 돌았다.
고정자산이다, OA자산 실사 준비다
이것저것 때문에... 소스분석하고 개선할 시간이 진짜 없었다.
개발자는 개발만 할 수 있으면 좋겠다. 흐흐흐...
오늘 화요일 현장을 돌아다니면서.. 요놈의 android가 계속 생각난다.
진짜 내가 맘에 들어하는 놈인거 가따.
일단 안드로이드 분석은 이쯤 하면 됐다 싶고....
계산기란 놈을 함 만들어보고 싶었다.
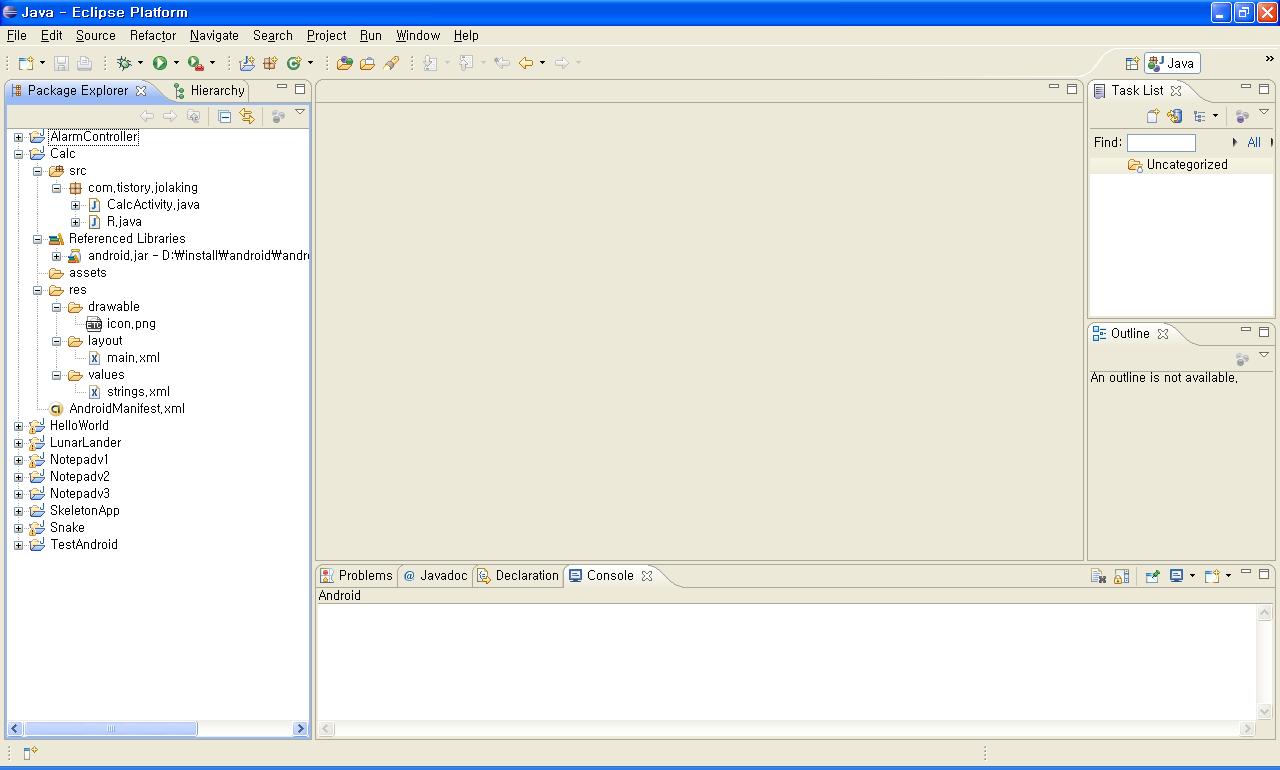
일단 기본android 프로젝트를 생성했다 .Calc라는 놈으로
프로젝트 생성을 마치고...젤 먼저 생각해야 될 것이..
UI이다.
일단 계산하는 값 2개를 받고
연산자 선택하고
결과 같 표시를 해야 될 듯 싶어
다음과 같이 만들었다.
res/layout/main.xml
-------------------------------------------------------------------------------------------------
<?xml version="1.0" encoding="utf-8"?>
<LinearLayout xmlns:android="http://schemas.android.com/apk/res/android"
android:orientation="vertical"
android:layout_width="fill_parent"
android:layout_height="fill_parent"
>
<TextView id="@+id/result"
android:layout_width="wrap_content"
android:layout_height="wrap_content"
android:text="@string/result" />
<LinearLayout android:orientation="horizontal"
android:layout_width="fill_parent"
android:layout_height="wrap_content"
>
<EditText id="@+id/leftBox" android:layout_width="fill_parent"
android:layout_height="wrap_content"
android:layout_weight="1" />
<TextView id="@+id/operator"
android:layout_height="fill_parent"
android:layout_width="wrap_content"
android:text="@string/operator"/>
<EditText id="@+id/rightBox" android:layout_width="fill_parent"
android:layout_height="wrap_content"
android:layout_weight="1" />
</LinearLayout>
<LinearLayout android:orientation="horizontal"
android:layout_width="fill_parent"
android:layout_height="wrap_content"
>
<Button id="@+id/operatorPlus"
android:text="@string/operatorPlus"
android:layout_width="wrap_content"
android:layout_height="wrap_content" />
<Button id="@+id/operatorMinus"
android:text="@string/operatorMinus"
android:layout_width="wrap_content"
android:layout_height="wrap_content" />
<Button id="@+id/operatorMulti"
android:text="@string/operatorMulti"
android:layout_width="wrap_content"
android:layout_height="wrap_content" />
<Button id="@+id/operatorDivide"
android:text="@string/operatorDivide"
android:layout_width="wrap_content"
android:layout_height="wrap_content" />
</LinearLayout>
<Button id="@+id/calculate"
android:text="@string/calculate"
android:layout_width="wrap_content"
android:layout_height="wrap_content" />
</LinearLayout>
----------------------------------------------------------------------------------------------
두번째로는 text값을 저장하고 있는 string.xml생성
/res/values/string.xml
----------------------------------------------------------------------------------------------
<?xml version="1.0" encoding="utf-8"?>
<resources>
<string name="app_name">calculator</string>
<string name="result">Calculation Result</string>
<string name="calculate">calculate</string>
<string name="operator">oper</string>
<string name="operatorPlus">+</string>
<string name="operatorMinus">-</string>
<string name="operatorMulti">*</string>
<string name="operatorDivide">/</string>
</resources>
---------------------------------------------------------------------------------------------
세번째로 각 버튼마다 이벤트를 넣었다.
src/com.tistory.jolaking/CalcActivity.java
----------------------------------------------------------------------------------------------
package com.tistory.jolaking;
import android.app.Activity;
import android.os.Bundle;
import android.view.View;
import android.widget.Button;
import android.widget.EditText;
import android.widget.TextView;
public class CalcActivity extends Activity {
private TextView tv;
private Button operatorPlus;
private Button operatorMinus;
private Button operatorMulti;
private Button operatorDivide;
private TextView operView;
String oper;
String [] operations = {"+", "-", "*", "/"};
/** Called when the activity is first created. */
@Override
public void onCreate(Bundle icicle) {
super.onCreate(icicle);
setContentView(R.layout.main);
Button calculate = (Button) findViewById(R.id.calculate);
tv = (TextView) findViewById(R.id.result);
operatorPlus = (Button) findViewById(R.id.operatorPlus);
operatorMinus= (Button) findViewById(R.id.operatorMinus);
operatorMulti= (Button) findViewById(R.id.operatorMulti);
operatorDivide= (Button) findViewById(R.id.operatorDivide);
operView = (TextView) findViewById(R.id.operator);
operatorPlus.setOnClickListener(new View.OnClickListener(){
@Override
public void onClick(View arg0) {
// TODO Auto-generated method stub
oper = "+";
operView.setText("+");
}
});
operatorMinus.setOnClickListener(new View.OnClickListener(){
@Override
public void onClick(View arg0) {
// TODO Auto-generated method stub
oper = "-";
operView.setText("-");
}
});
operatorMulti.setOnClickListener(new View.OnClickListener(){
@Override
public void onClick(View arg0) {
// TODO Auto-generated method stub
oper = "*";
operView.setText("*");
}
});
operatorDivide.setOnClickListener(new View.OnClickListener(){
@Override
public void onClick(View arg0) {
// TODO Auto-generated method stub
oper = "/";
operView.setText("/");
}
});
calculate.setOnClickListener(new View.OnClickListener(){
@Override
public void onClick(View arg0) {
// TODO Auto-generated method stub
try{
EditText leftBox = (EditText) findViewById(R.id.leftBox);
EditText rightBox = (EditText) findViewById(R.id.rightBox);
String leftValue = leftBox.getText().toString();
String rightValue = rightBox.getText().toString();
String operator = oper;
double result = calculate(leftValue, rightValue, operator);
tv.setText(String.valueOf(result));
}catch(Exception e){
tv.setText("Incorrect String");
}
}
});
}
public double calculate(String leftValue, String rightValue, String operator) throws Exception{
double result = 0;
int operIndex = 99;
// operation 검사
for(int i = 0 ; i < operations.length ; i++){
if(operations[i].equals(operator)){
operIndex = i;
break;
}
}
if(operIndex == 99)
throw new Exception();
double leftV = Double.parseDouble(leftValue);
double rightV = Double.parseDouble(rightValue);
if(operator.equals("+")){
result = leftV + rightV;
}else if(operator.equals("-")){
result = leftV - rightV;
}else if(operator.equals("*")){
result = leftV * rightV;
}else if(operator.equals("/")){
result = leftV / rightV;
}
return result;
}
}
---------------------------------------------------------------------------------------------------
이게 끝...
생각보다 간단히 만들었다...간만에 오류 없이 컴파일까지 되더라..
역시 JAVA는 깊게 들어갈 수록 어렵지만...초반엔 적응하기 싶더라...
일단 여기까지 하면 R.java는 자동으로 생성이 될 것이고 ...실행을 해봤더니..ㅡ.ㅡ
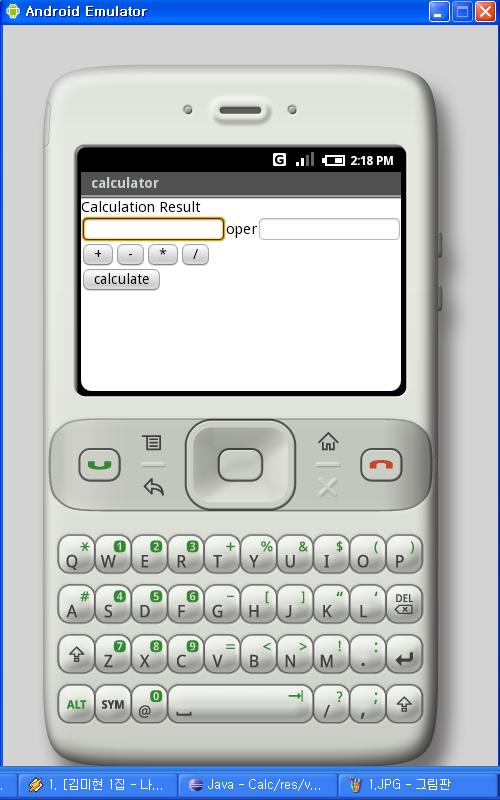
계산기 실행화면.. 단순하다 ㅡ.ㅡ
에게 줄맞춤도 그렇고.. 디자인은 진짜 허접하다 흐흐흐
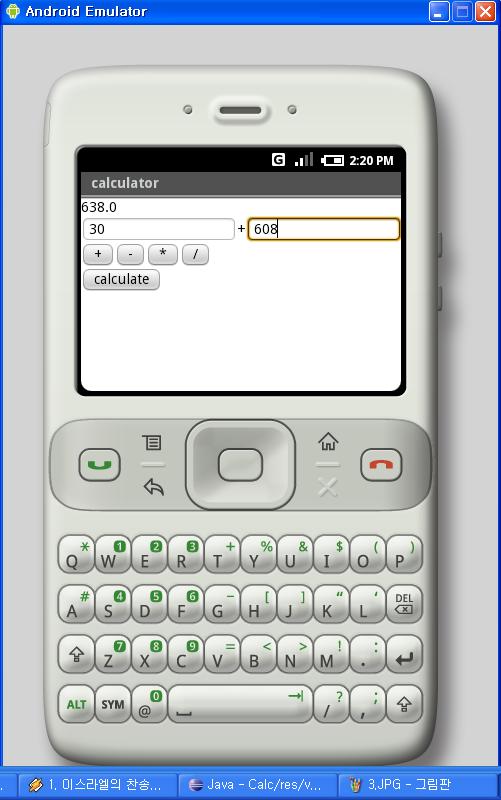
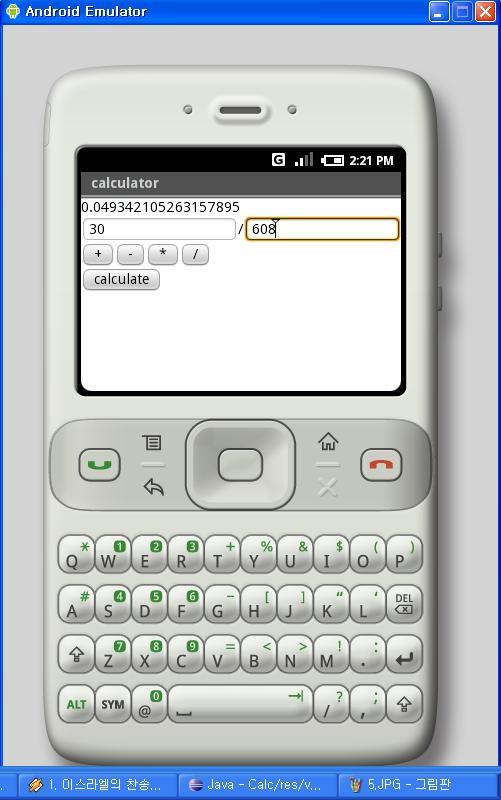
이래도 사칙연산을 실행해보면 아래와 같이 잘 되는군..후훗


에혀.. 다시봐도 맘에 안드는게.. 역시 UI는 이뻐야 된다는 거..
layout 관련 API좀 더 자세히 봐야겠다..
담에는 내 핸폰에 있는 PGM UI 똑같이 만드는거 연습좀 하자..
그럼 끝.
설정
트랙백
댓글
글
Android 몇가지 데모 실행 성공 -__-
처음에 Hello Android 를 실행시켜보고
자동으로 만들어진 소스를 보면서
Framework을 처음 접했을 때의 기분을 느꼈다.
ejb나 spring처럼 눈에 전혀 들어오지도 않았고
activity, intent, bundle 등의 용어도 생소하였기에 ..
그냥 소스만 계속 보고 또 보고 또 봤다. 진짜 몇일동안 내내 본거 같다.
그리고 드뎌.. 이제 왠만한 소스는 이해가 잘 되었다.
그래서 처음엔..sample 소스라고 제공된 놈들을 어뜨케 실행해야 될찌 막막했지만
지금에야 다시 보니. 삘이 왔따.
그럼 거거싱
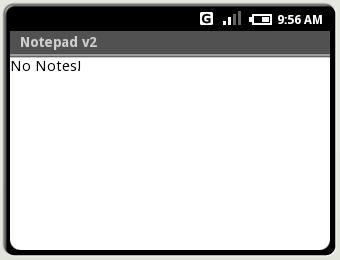
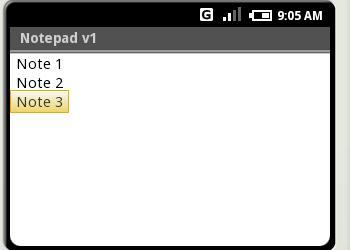
Notepad v2 따라 작성하고 실행한 모습 단순하다
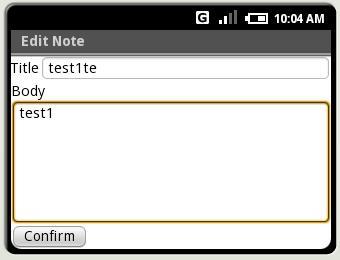
제목과 내용을 입력하고 confirm을 하면 저장이 된다.
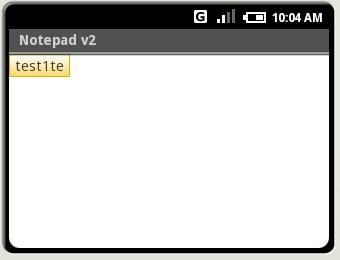
저장된 리스트가 보인다.
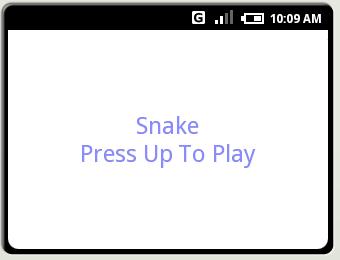
추억의 뱀 게임
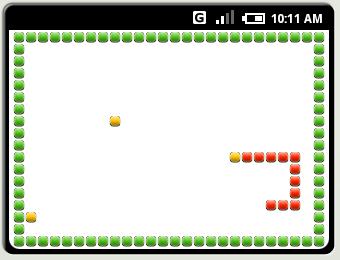
그냥 방향키로 게임가능
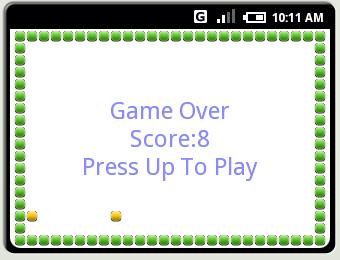
재미없어서 이건 빨리 끝냈다.
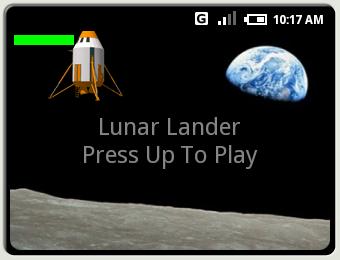
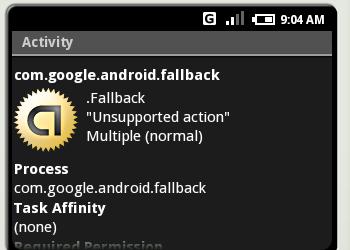
인터넷에서 보던 그 정체불명의 게임
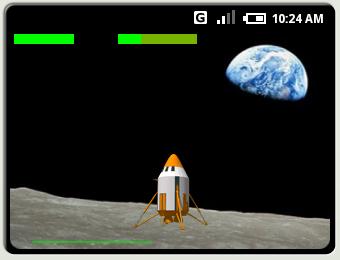
스페이스바를 누르면 에너지 남아 있는 만큼 부스터(?)를 쓸수 있다.
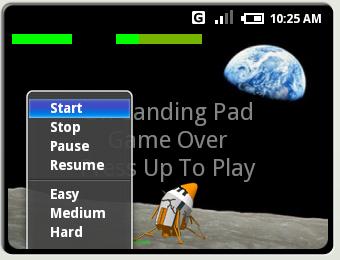
쩜 재미 없었다. 빨리끝나고
설정
트랙백
댓글
글
Android Architecture(안드로이드 아키텍쳐)
참 궁금하게 만들었던 이것!!
리눅스 커널상에서 오히려 PC보다 화려한 하드웨어(WIFI, Bloutooth) 지원을 하고 있네?
그렇다면 핸드폰 상에서 내가 Java로 만든 모든 Program을 실행할 수 있다는 거네?
국내에서 출시 안된다 하더라도.. 충분히 가지고 놀 만한 놈이기에
해외주문 할 생각도 하고 있다.
근데 어떻케 이걸 핸드폰에 올리지? 응? 응? 응?
설정
트랙백
댓글
글
Activity란 무엇인가?
Activity에 대한 정의가 수없이 나온다.(물론 다른것도 마찬가지겠지만...)
일단 Activity란 무엇인가?
activity는 보통 당신이 만든 application의 하나의 screen이다. 다시 정리하자면
핸드폰에 보이는 하나의 화면 하나하나의 단위라 보면 된다.
수정 20071210(월)
android 홈피에 나온 정의를 보면
activity는 기본적으로 라이프 사이클을 가지고 있는 객체이다. Activity는 어떤작업을 하는 큰덩어리의 코드이다.
필요하다면..그 작업은 사용자에게 UI를 표시하는 것도 포함할 수 있다. 하지만 하지 말아야 한다. 몇몇 Activities는 UIs를 결코 표시하지 않는다. 일반적으로, 너는 너의 app의 시작점으로써 당신의 App의 activities들중에 하나를 설계할 것이다.... (으흠....UI그리는 것을...xml에서 하란건가? ㅡ.ㅡ)
예를 들자면...
핸드폰을 짠~ 열었을때 나오는 초기 배경화면도 하나의 activity고
문자메시지를 보내는 화면 하나도 activity다..
물론 activity에 여러 view, service등이 붙게되어 하나의 화면을 완성하게 되겠지만
일단 이정도로 이해하는 것이 좋겠다. 뒤에는 용어도 생소한 Bundle, Intent등이 대기중이다 ㄷㄷㄷㄷ
개발할 때 가장 기본이 되는 activity의 life사이클에 대한 정확한 이해를 가져야 나중에 편해질 것이다.
life cycle은 크게 4개의 상태로 나눠질 수 있는데
이것만은 확실히 이해 했으면 좋겠다.
1. active or running : activity가 screen 정면에서 사용중일 때,
2. paused : 여전히 화면에는 보이지만 포커스를 잃었거나 full size로 표시되지 않을 때
3. stopped : 다른 activity에 의해서 화면에서 완전히 사라졌을 때
4. killed : activity가 완전히 메모리에서 제거되거나, 프로세스가 죽을 때

끝.
설정
트랙백
댓글
글
Android Release
구글폰 자체가 아닌.
구글폰에서 돌아갈수 있게 도와주는 OS와
SDK 환경이다.
내 이클립스는 너무 지저분 하기 때문에
이것저것 플러그인들이 깔려 있다. 너무 많아 몰 설치했는지조차 모르겠다.
새로운 마음으로
이클립스 3.3.1, 자바 1.6.0 글고 초기버전 SDK를 설치하여서
Hello Android 실행
초기실행화면

근데 문자가 깨진다.
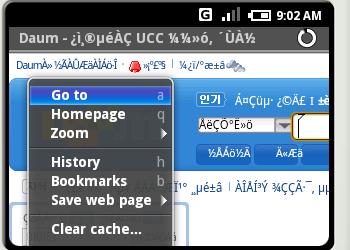
역시 다음도 한글이 깨진다.
상당히 느리다는 느낌이 든다. 어짜피 PC상 버추얼머신인
Dalvik에서 돌아가고 여기저기 거친다지만 그래도 짜증나게 느리다
SQLite 를 사용하여 DATA를 저장하게 만들어서그른지..
프로세스 죽이고 재가동해도 DATA가 남아 있었다. 신기신기
또 좀더 가지고 놀아야겠당.. 그름