검색결과 리스트
GUI에 해당되는 글 2건
- 2008.01.15 2. 기본문법2(class, object and variables)
- 2007.12.04 android GUI vs XML (android/samples/app)
글
2. 기본문법2(class, object and variables)
1. Class, Object and Variables(루비)
class Song
def initialize(name, artist, duration)
@name = name
@artist = artist
@duration = duration
end
end
initialize는 Ruby에서 특별한 method다. Song.new로 객체를 생성할때 new뒤에 붙는 파라미터들은
initialize메소드로 들어가게된다.
aSong = Song.new{"Bicylops", "Fleck", 260}
예제)
class Song
def initialize(name, artist, duration)
@name = name
@artist = artist
@duration = duration
end
def to_s
"Song: #{@name}--#{@artist} (#{@duration})"
end
end
aSong = Song.new("Bicylops", "Fleck", 260)
aSong.to_s
>> Song: Bicylops--Fleck (260)
2. Inheritance and Messages
class KaraokeSong < Song
def initialize(name, artist, duration, lyrics)
super(name, artist, duration)
@lyrics = lyrics
end
end
"< Song" 은 KaraokeSong이 Song의 sub클래스임을 의미한다.
다시한번
class Song
def initialize(name, artist, duration)
@name = name
@artist = artist
@duration = duration
end
def to_s
"Song: #{@name}--#{@artist} (#{@duration})"
end
end
class KaraokeSong < Song
def initialize(name, artist, duration, lyrics)
super(name, artist, duration)
@lyrics = lyrics
end
def to_s
"Song: #{@name}--#{@artist} (#{@duration}) #{@lyrics}"
end
end
aSong = Song.new("Bicylops", "Fleck", 260)
puts aSong.to_s
bSong = KaraokeSong.new("My Way", "Sinatra", 225, "And new, the...")
puts bSong.to_s
>>
Song: Bicylops--Fleck (260)
Song: My Way--Sinatra (225) And new, the...
이것을 다시 Ruby 문법으로 간단하게 바꿔보자
KaraokeSong의 to_s를
"Song: #{@name}--#{@artist} (#{@duration}) #{@lyrics}" => super + " #{@lyrics}"
로 바꾸면 더욱 간단해 진다.
3. Inheritance and Mixins
ruby는 단일상속만 지원하지만 많은수의 mixins기능을 포함할 수 잇따
(몬말인지는 나중에 설명한다... ㅡ.ㅡ)
4. Object and Attributes
앞서 작성한 song객체의 state는 private상태이다. 다른 곳에서 부를수가 없다는 말이겠지
class Song
attr_reader :name, :artist, :duration
def initialize(name, artist, duration)
@name = name
@artist = artist
@duration = duration
end
def name
@name
end
def artist
@artist
end
def duration
@duration
end
end
aSong = Song.new("Bicylops", "Fleck", 260)
puts aSong.artist
puts aSong.name
puts aSong.duration
로칼변수를 write하기 위해서는
def duration=(newDuration)
@duration = newDuration
end
또는
attr_writer :duration
을 사용해라(주의 def duration=(newDuration) 에 스페이스는 없어야된다.)
5. Virtual Attributes
class Song
def durationInMinutes
@duration/60.0
end
end
aSong.durationInMinues
처럼 가상의 변수를 만들어 사용할 수 잇따.
6. Class Variables and Class Methods
- class variables
class Song @@plays = 0 def initialize(name, artist, duration) @name = name @artist = artist @duration = duration @plays = 0 end def play @plays += 1 @@plays += 1 "This song: #@plays plays. Total #@@plays plays." end end |
s1 = Song.new("Song1", "Artist1", 234) # test songs.. | ||
s2 = Song.new("Song2", "Artist2", 345) | ||
s1.play |
» | "This song: 1 plays. Total 1 plays." |
s2.play |
» | "This song: 1 plays. Total 2 plays." |
s1.play |
» | "This song: 2 plays. Total 3 plays." |
s1.play |
» | "This song: 3 plays. Total 4 plays." |
- class methods
class SongList | ||
MaxTime = 5*60 # 5 minutes | ||
def SongList.isTooLong(aSong) | ||
return aSong.duration > MaxTime | ||
end | ||
end | ||
song1 = Song.new("Bicylops", "Fleck", 260) | ||
SongList.isTooLong(song1) |
» | false |
song2 = Song.new("The Calling", "Santana", 468) | ||
SongList.isTooLong(song2) |
» | true |
7. Singletons and Other Constructors
singletons를 사용하기 위해서는 new의 사용을 막고,
create같은 method를 사용해라.
class Logger
private_class_method :new
@@logger = nil
def Logger.create
@@logger = new unless @@logger
@@logger
end
end
puts Logger.create.id
puts Logger.create.id
>>
22918100
22918100
class Shape def Shape.triangle(sideLength) Shape.new(3, sideLength*3) end def Shape.square(sideLength) Shape.new(4, sideLength*4) end end |
8. Access Control
- public methods : 누구나 호출가능
- protected methods : 상속받은 sub class만 호출가능
- private methods : 외부에서는 호출할 수 없음
하지만 Ruby는 다른 OO언어들과는 다르다. Access control은 프로그램이 실행될 때 동적으로 결정된다.
당신은 제한된 mothod를 실행하기 시도할때만 당신은 이 규칙을 위반할 수 있다.
Specifying Access Control
public, protected, private를 사용하여 class나 module정의할때 access level을 정의할 수 있다.
class MyClass
def method1 # default is 'public'
#...
end
protected # subsequent methods will be 'protected'
def method2 # will be 'protected'
#...
end
private # subsequent methods will be 'private'
def method3 # will be 'private'
#...
end
public # subsequent methods will be 'public'
def method4 # and this will be 'public'
#...
end
end
다른 방법으로는
class MyClass
def method1
end
# ... and so on
public :method1, :method4
protected :method2
private :method3
end
클래스의 initialize method는 자동으로 private로 선언된다.
class Accounts
private
def debit(account, amount)
account.balance -= amount
end
def credit(account, amount)
account.balance += amount
end
public
#...
def transferToSavings(amount)
debit(@checking, amount)
credit(@savings, amount)
end
#...
end
class Account
attr_reader :balance # accessor method 'balance'
protected :balance # and make it protected
def greaterBalanceThan(other)
return @balance > other.balance
end
end
9. Variables
person = "Tim"
puts person.id
puts person.type
puts person
>>
22918640
String
Tim
person1 = "Tim"
person2 = person1
person1[0] = 'J'
puts person1
puts person2
>>
Jim
Jim
person1 = "Tim"
person2 = person1.dup
person1[0] = 'J'
puts person1
puts person2
>>
Jim
Tim
person1 = "Tim"
person2 = person1
person1.freeze # prevent modifications to the object
person2[0] = "j"
>>
Logger.rb:4:in `[]=': can't modify frozen string (TypeError)
설정
트랙백
댓글
글
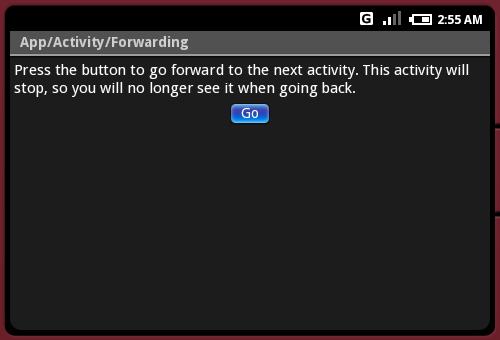
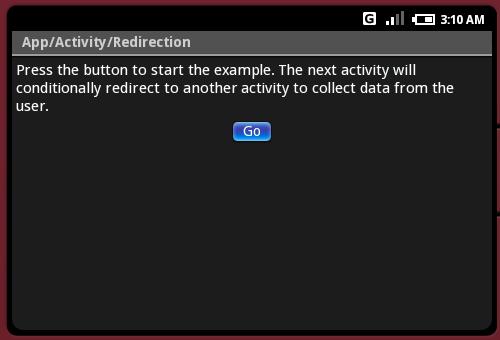
android GUI vs XML (android/samples/app)
forwarding.xml
android:gravity="center_horizontal"
android:layout_width="fill_parent" android:layout_height="fill_parent">
<TextView
android:layout_width="fill_parent" android:layout_height="wrap_content"
android:layout_weight="0"
android:paddingBottom="4dip"
android:text="@string/forwarding"/>
<Button id="@+id/go"
android:layout_width="wrap_content" android:layout_height="wrap_content"
android:text="@string/go">
<requestFocus />
</Button>
</LinearLayout>
-----------------------------------------------------------------------------------------------------
2. hello_world.xml
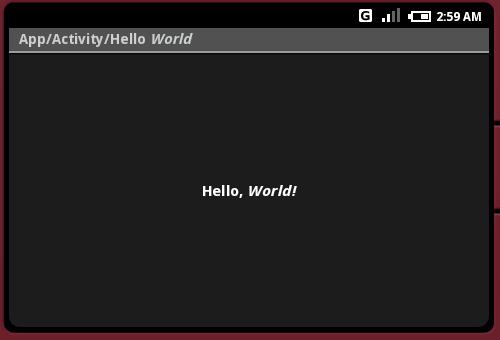
<TextView xmlns:android="http://schemas.android.com/apk/res/android" id="@+id/text"
android:layout_width="fill_parent" android:layout_height="fill_parent"
android:gravity="center_vertical" android:textAlign="center"
android:text="@string/hello_world"/>
-----------------------------------------------------------------------------------------------------
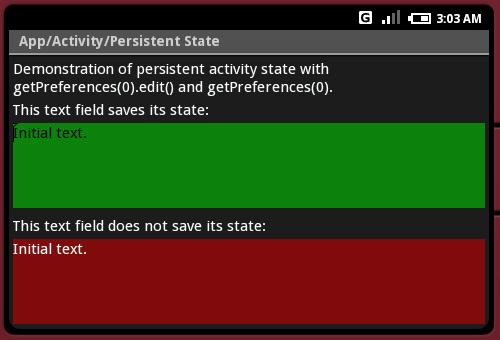
3. save_restore_state.xml
android:layout_width="fill_parent" android:layout_height="fill_parent">
<TextView id="@+id/msg"
android:layout_width="fill_parent" android:layout_height="wrap_content"
android:layout_weight="0"
android:paddingBottom="4dip" />
<TextView
android:layout_width="fill_parent" android:layout_height="wrap_content"
android:layout_weight="0"
android:paddingBottom="4dip"
android:text="@string/saves_state"/>
<EditText id="@+id/saved"
android:layout_width="fill_parent" android:layout_height="wrap_content"
android:layout_weight="1"
android:background="@drawable/green"
android:text="@string/initial_text">
<requestFocus />
</EditText>
<TextView
android:layout_width="fill_parent" android:layout_height="wrap_content"
android:layout_weight="0"
android:paddingTop="8dip"
android:paddingBottom="4dip"
android:text="@string/no_saves_state"/>
<EditText
android:layout_width="fill_parent" android:layout_height="wrap_content"
android:layout_weight="1"
android:background="@drawable/red"
android:text="@string/initial_text">
</EditText>
</LinearLayout>
-----------------------------------------------------------------------------------------------------
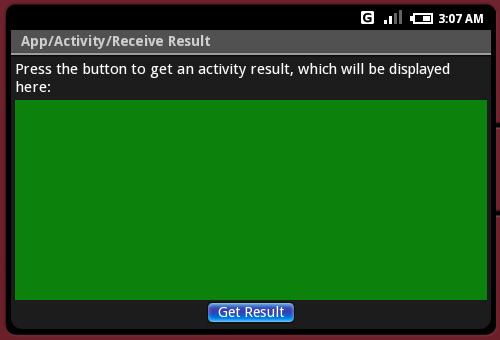
4. receive_result.xml
<LinearLayout xmlns:android="http://schemas.android.com/apk/res/android" android:orientation="vertical" android:padding="4dip"
android:gravity="center_horizontal"
android:layout_width="fill_parent" android:layout_height="fill_parent">
<TextView
android:layout_width="fill_parent" android:layout_height="wrap_content"
android:layout_weight="0"
android:paddingBottom="4dip"
android:text="@string/receive_result_instructions"/>
<TextView id="@+id/results"
android:layout_width="fill_parent" android:layout_height="10dip"
android:layout_weight="1"
android:paddingBottom="4dip"
android:background="@drawable/green">
</TextView>
<Button id="@+id/get"
android:layout_width="wrap_content" android:layout_height="wrap_content"
android:layout_weight="0"
android:text="@string/receive_result_result">
<requestFocus />
</Button>
</LinearLayout>
-----------------------------------------------------------------------------------------------------
5. redirect_enter.xml
<LinearLayout xmlns:android="http://schemas.android.com/apk/res/android" android:orientation="vertical" android:padding="4dip"
android:gravity="center_horizontal"
android:layout_width="fill_parent" android:layout_height="fill_parent">
<TextView
android:layout_width="fill_parent" android:layout_height="wrap_content"
android:layout_weight="0"
android:paddingBottom="4dip"
android:text="@string/redirect_enter"/>
<Button id="@+id/go"
android:layout_width="wrap_content" android:layout_height="wrap_content"
android:text="@string/go">
<requestFocus />
</Button>
</LinearLayout>
-----------------------------------------------------------------------------------------------------
6. translucent_background.xml
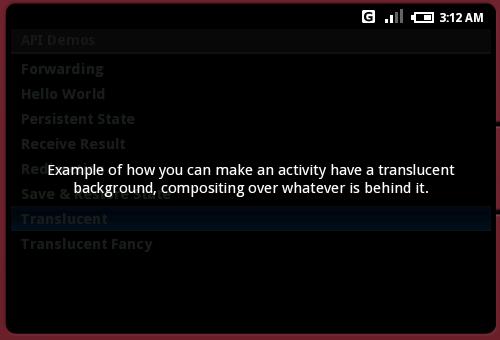
android:layout_width="fill_parent" android:layout_height="fill_parent"
android:gravity="center_vertical" android:textAlign="center"
android:text="@string/translucent_background"/>
-----------------------------------------------------------------------------------------------------
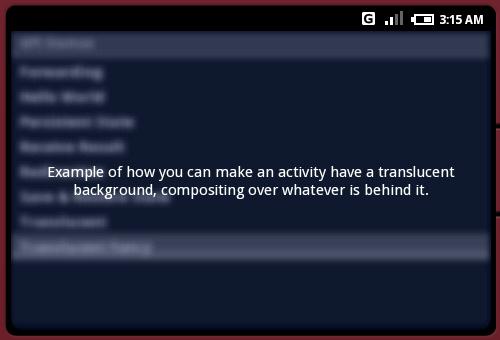
7. TranslucentFancyActivity.java
protected void onCreate(Bundle icicle)
{
// Be sure to call the super class.
super.onCreate(icicle);
// Have the system blur any windows behind this one.
getWindow().setFlags(WindowManager.LayoutParams.BLUR_BEHIND_FLAG,
WindowManager.LayoutParams.BLUR_BEHIND_FLAG);
// Apply a tint to any windows behind this one. Doing a tint this
// way is more efficient than using a translucent background. Note
// that the tint color really should come from a resource.
WindowManager.LayoutParams lp = getWindow().getAttributes();
lp.tintBehind = 0x60000820;
getWindow().setAttributes(lp);
// See assets/res/any/layout/translucent_background.xml for this
// view layout definition, which is being set here as
// the content of our screen.
setContentView(R.layout.translucent_background);
}